This is a sponsored post written by me on behalf of FrogTape®. All opinions are 100% mine.
I’ve been thinking about repainting our bathroom for a while but kept putting it off because there are about a million pieces of trim and other things to paint around, like the doorframe, window trim, baseboards, open shelving, vanities, towel bars, light fixtures, tub tile, ceiling, you name it.
For such a small room, the list goes on and on.
Well I finally just dove in and did it! It looks soooo good, I’m really glad I painted it.
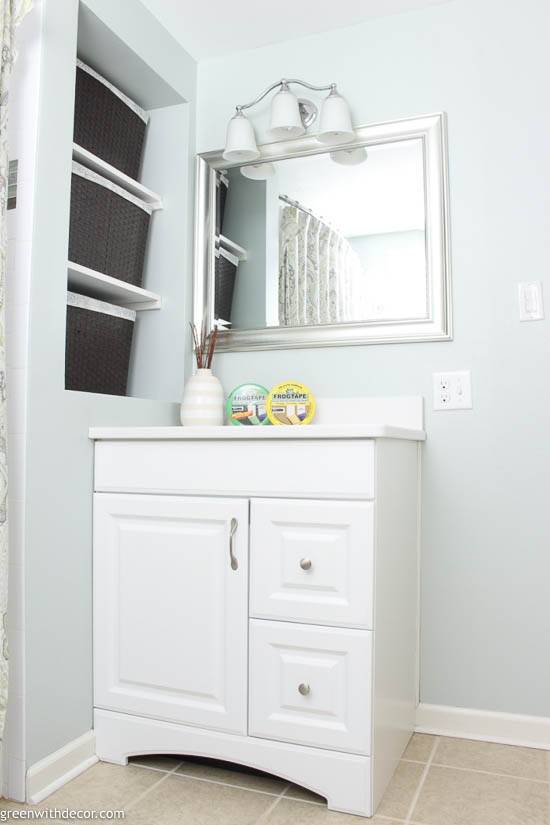
A reminder, here’s how the bathroom looked before:
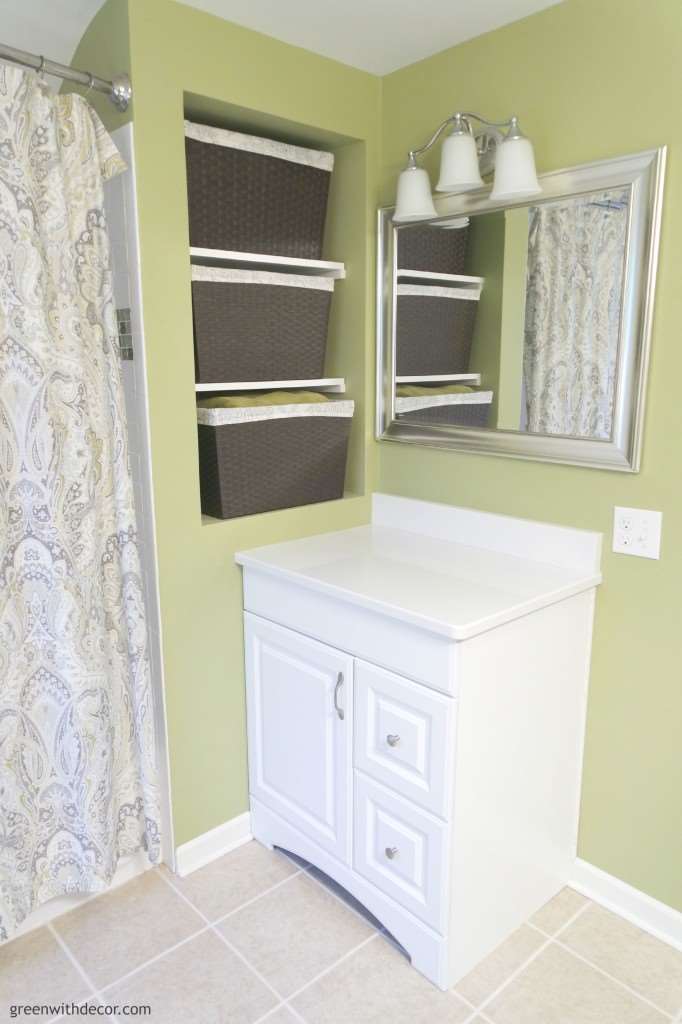
Don’t get me wrong, I love green (obviously), but I was just ready for a change. I was thinking I would switch out our towels or the baskets in the open shelving to brighten it up in here.
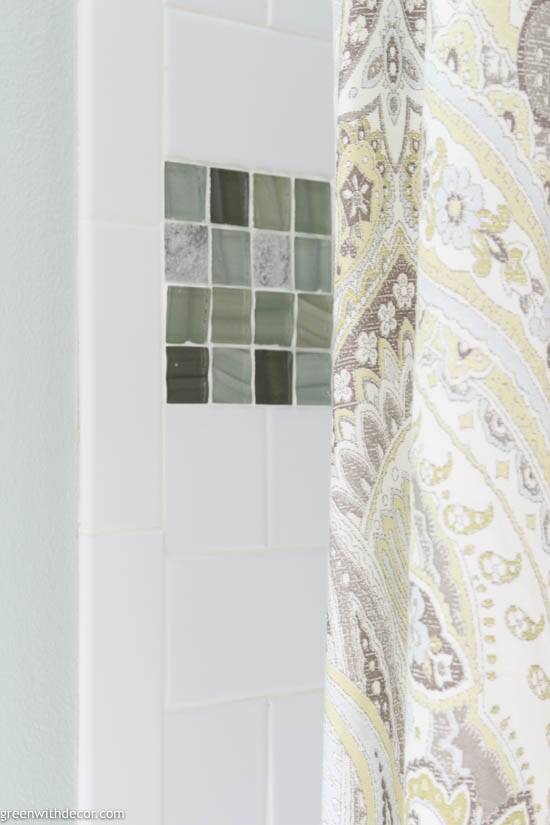
But the lighter blue paint color makes the while room feel brighter so some of those darker accessories pop now. And even better, the color still ties into our shower curtain and the colored tile in our tub. It all just seems so much lighter!
A huge part of what made this project with a million edges to paint so do-able? FrogTape® Painting Tape!

I knew if I was going to spend all that time taping this room off for a fresh paint color, I needed to use the best painters tape out there! Clean lines were a must after all my work taping and painting or this project wasn’t going to be worth it.
FrogTape® is known for their clean lines, and they definitely delivered.
Picking the right painters tape for your project:
- Multi-Surface FrogTape® (green): This tape will work on most surfaces – basically if you don’t need the yellow tape (more on that right below), then you can use this one.
- Delicate Surface FrogTape® (yellow): Despite my obsession with painting everything in sight, I’d somehow never used their yellow tape before, and it’s a GAME CHANGER. It’s awesome how you can use it on surfaces where you’d typically be afraid to use painters tape (fresh paint, faux finishes, veneer, laminate, drywall and wallpaper) because you might ruin the finish and create an even bigger project for yourself. Plus I also loved that the yellow tape is pretty see through so it’s easy to make sure you’re pressing the tape exactly along the line you want to.
FrogTape® gives such clean lines because its made with exclusive PaintBlock® Technology, an absorbent polymer that reacts with the water in latex paint, then instantly gels, forming a micro-barrier that seals the edges of the tape to prevent any paint bleed. Which means you won’t have ot do any touchups!
Now that is what all of us DIY painters need!
Tips on using FrogTape® Painting Tape to paint walls:
1. Remove whatever you can such as outlet/switch plate covers, towel bars, etc.
2. Apply your painters tape along the baseboard (or window trim, doorframe, etc.).
You can either apply the tape in long or short stretches, just be sure to overlap your new piece with the tape you just applied.
I typically go with shorter pieces for a few reasons:
- To ensure I’m really taping along the edges without stretching the tape.
- If you’re a fellow old house homeowner, odds are, your walls/ceiling aren’t *perfectly* straight either so shorter tape pieces help you put tape exactly where it needs to be!
- Around corners and curves (like above our tub), I used a lot of short tape pieces to make sure I’d end up with clean paint lines.
But if you’re more talented than me (and in a new build home), go for longer stretches of tape! And maybe come over and help me next time?! Ha!
3. Go back along the tape, really pressing down with your finger or a plastic card to ensure you’ll get a nice clean paint line.
4. When painting along the wall edges, paint a few feet at a time, then move onto another section, painting a few feet at a time, repeating until you have all of the edges painted.
I’ve found it’s best not to go back over any parts after a couple minutes, because you’re more likely to end up with a streaky brush stroke look.
Just let the paint dry and trust that your second coat of paint will do its job!
5. After you paint along all of the edges, use a roller for the bigger wall sections.
For reference, I did three coats of paint in the bathroom. I’d rather do more lighter coats to avoid those brushstrokes than do less coats and end up with a look I don’t love.
(I wrap my brush in a plastic resealable bag and keep it in the fridge between coats – you don’t have to wash it out till you’re done with your last coat.)
6. Remove the painters tape when your last coat is still wet, pulling it off at a 45-degree angle.
I definitely used a LOT of painters tape for this project. But it was all worth it!
You can learn more about FrogTape® here.
I looooove our bright bathroom now! Chalk another one up to the power of paint (and good painters tape)!
I think if we swap out the light fixtures and get the vanities organized, we may just be able to call this room done for real!
Do you have any painting projects planned this summer?
Remember to bookmark or pin this post if you want to save it for later!
Pin it!
Want to read more posts like this?
Follow along: Get my emails | Facebook | Pinterest | Twitter | Instagram
Emily says
Loooove the new color! It works so well with your existing shower curtain, tile & those baskets. I’ve used both of the big brands of painter’s tape, and I agree, FrogTape is the best. I didn’t know about the yellow tape for delicate surfaces! I’ll need to add that to our bin full of painting supplies!
GreenWithDecor says
Thanks so much, Emily! I love how it ties in with our existing tile and shower curtain! The yellow tape is awesome – you’ll love it!