Disclosure: This post is sponsored by Country Chic Paint. All opinions, images and love of painting projects are 100% mine.
Sometimes life is crazy, and you just need to take a break.
For me, furniture painting usually does the trick.
Taking an old, beat-up table and turning it into something pretty does wonders for my mental state.
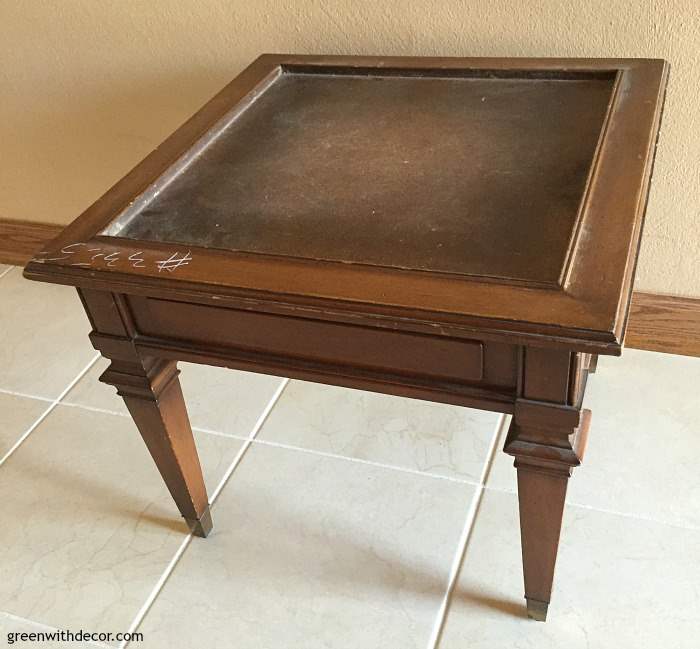
I found this little table at a thrift store a while back and thought it would make for a fun little painting project someday.
Who else just can’t resist taking beat up old tables home with them?
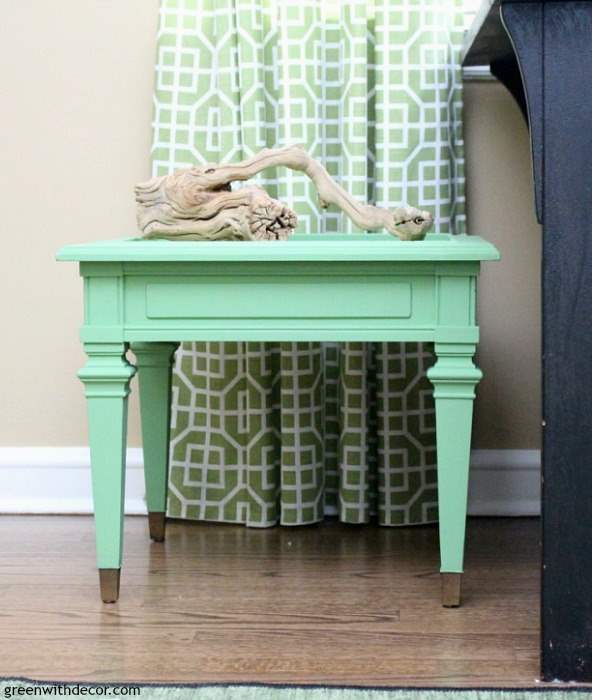
And look at it now.
I even decided to try a new brand of paint on it just for fun. Well, sometimes furniture makeovers don’t go as planned.
I tried said new paint brand (which, by the way, was supposed to be very much blue), and it turned out reaaal purple. What the what?
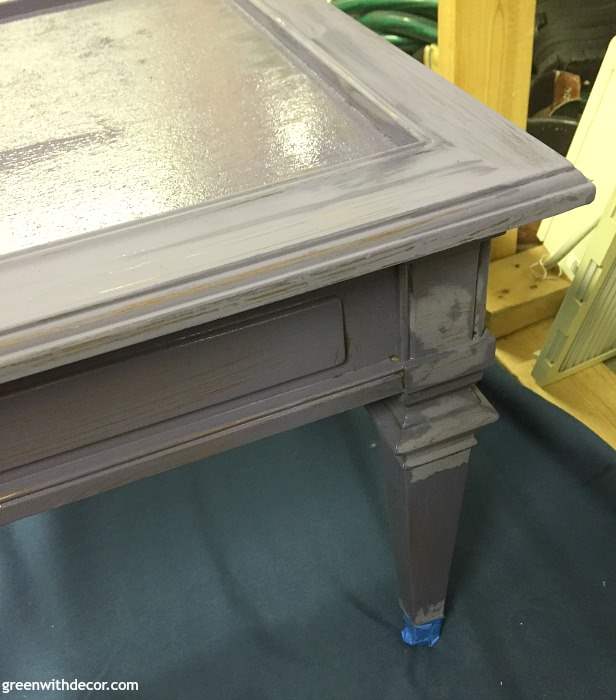
Needless to say, that paint is the garbage.
I went back to one of my trusty favorites, Country Chic Paint.
Sometimes you just gotta go back to what you love and what you know will work. I’d been wanting to try out Country Chic Paint’s green Rustic Charm color anyway, so this was the perfect excuse to do just that.
The table started like this:
You can see all of my furniture makeovers here.
I love them all, but my favorites are this painted desk that used to be my grandparents’ and these two-toned painted nightstands in my parents’ beachy guest room and … okay, I really like them all so I’ll stop before I list every last one of them.
This post contains affiliate links. This means if you click the link and buy something, I may receive a small percentage of sales at no extra cost to you.
Supply list for painting a table with a lot of detailed trim:
- Drop cloth
- Sanding sponge (I looooove these.)
- Painter’s tape
- Paint brush
- Small paint brush
- Country Chic Paint’s Rustic Charm
- Wax brush (I used Country Chic Paint’s wax brush, which I bought on my own. I’ve mentioned this before: I love it and would highly recommend it over cheaper wax brushes.)
- Country Chic Paint’s Natural Wax
How to paint a table with a lot of detailed trim:
1. Prep your piece.
Clean your piece. I usually wipe furniture down with a damp cloth to get rid of any dirt and dust.
If it has a glossy finish like my table did, sand it down a bit.
If your piece has more of a matte finish, no need for sanding.
2. If your table has awesome gold ‘feet’ like mine does, tape them off with painter’s tape to protect them.
3. Paint your table.
Shake and stir the paint. This is especially important with clay paint since all of the pigments settle on the bottom of the jar.
Apply paint in the same direction as the wood grain.
Optional: Decide you hate the purple/fake-blue paint and repaint it with a shade of green you know you will love. 🙂

Let it dry overnight.
4. Paint a second coat.
I’m always amazed what a second coat does to a piece.
Let it dry.
5. Using a small paintbrush, paint along the edges of the trim to get paint in the nooks and crevices the bigger paint brush just can’t quite reach.
6. You may need to do a second coat with the small paint brush, depending on the paint coverage from your first coat.
7. Take the painter’s tape off.
I brought this piece out the basement dungeon to take the painter’s tape off, and I was so very happily surprised at HOW GOOD this table looks with the area rug in our living room.
It’s like they were meant for each other.
8. Optional: Distress your table.
When I first bought this table, I planned to use dark wax on it since it had so much detailed trim.
I thought it would be fun to play around with the wax on the different layers.
Then I fell in love with the Rustic Charm color and couldn’t bring myself to alter it. I feel like I always think I want to be someone who loves distressing furniture, and I just usually seem to prefer the sold painted look.
Although I did distress this painted desk, and it’s my favorite piece of furniture in our house, so go figure. I guess I love all painted furniture.
9. Seal the piece with wax.
Stir the wax brush around in the wax container, then apply the wax to your furniture piece in a circular motion.
Cover the whole piece, then use a clean, lint-free cloth to get rid of any excess wax.
The wax needs to be applied every 6 to 12 months to keep the piece sealed.
The top of an end table will see a lot more use than the legs, so you can probably get away with letting the legs go a bit longer.
All done!
Can we talk about how fun that piece of driftwood is? I picked it up at Marshall’s the other day.
I’ve said this before, but it’s worth repeating. Country Chic Paint has awesome tutorials on YouTube if you’ve ever stuck on a painting project.
Have you painted any tables lately? Or any pieces with a lot of detailed trim?
If you’re stressed to the max lately, too, I’d highly recommend painting some furniture. Or whatever it is that you find relaxing, do it.
You deserve it. The to-do list can wait an hour.
Want to see more furniture makeovers? Check these out:
- Gorgeous green furniture makeovers
- How to paint a bookshelf: Spray or paint by hand?
- How to paint a dresser
Remember to bookmark or pin this post if you want to save it for later!
Pin it!
Want to read more posts like this?
Follow along: Get my emails | Facebook | Pinterest | Twitter | Instagram
Emily says
This is such a great transformation, Meg! The color is so pretty, and at first glance, I totally thought you added the gold feet yourself – they’re the perfect accent to the green! I’m glad you were able to steal away to paint and de-stress for a bit – hope the move goes well!
GreenWithDecor says
Thanks, Emily! I love the green and gold together.
Cecilia MyThriftStoreAddiction says
Wow! Love the colors! Beautiful!
GreenWithDecor says
Thanks, Cecilia!
Maria says
What a beautiful color of green! its amazing how many shades of green.
Maria
GreenWithDecor says
Thanks, Maria! Gotta love green!